
All articles
How to edit element timing
On this page
To edit element timing, select a block in the timeline (or an element on the canvas), click the Edit timing icon, and drag each element’s bar to set when it appears, disappears, and how long it shows.
Common questions:
- Is there a way to change the order text is animated in a scene/slide?
- How do I control when elements appear on a scene?
Separate blocks or Edit Timing?
There are two ways to make text or images appear at different times in a scene, and which is easier depends on what you're building:
- Separate blocks on the timeline — give each text box or image its own block and drag it along the timeline to set when it appears and how long it stays. This is usually easier to manage for a long scene where text or images appear one after another.
- Edit Timing within one block — keep the elements in a single block and adjust each one's appearance and duration (the steps below). This is the better choice when elements share the same moment: layering on top of each other, coming in and out, or persisting together.
How to create separate blocks
To set items up as separate blocks, either duplicate a block into a new group and drag it along the timeline (see add, duplicate, or delete an element block), or deselect everything first and then click Add Text — with no block selected, the new text starts its own block. If you add text while a block is selected, it joins that block instead.
How to edit timing from the timeline
- In the timeline, locate the scene you want to edit
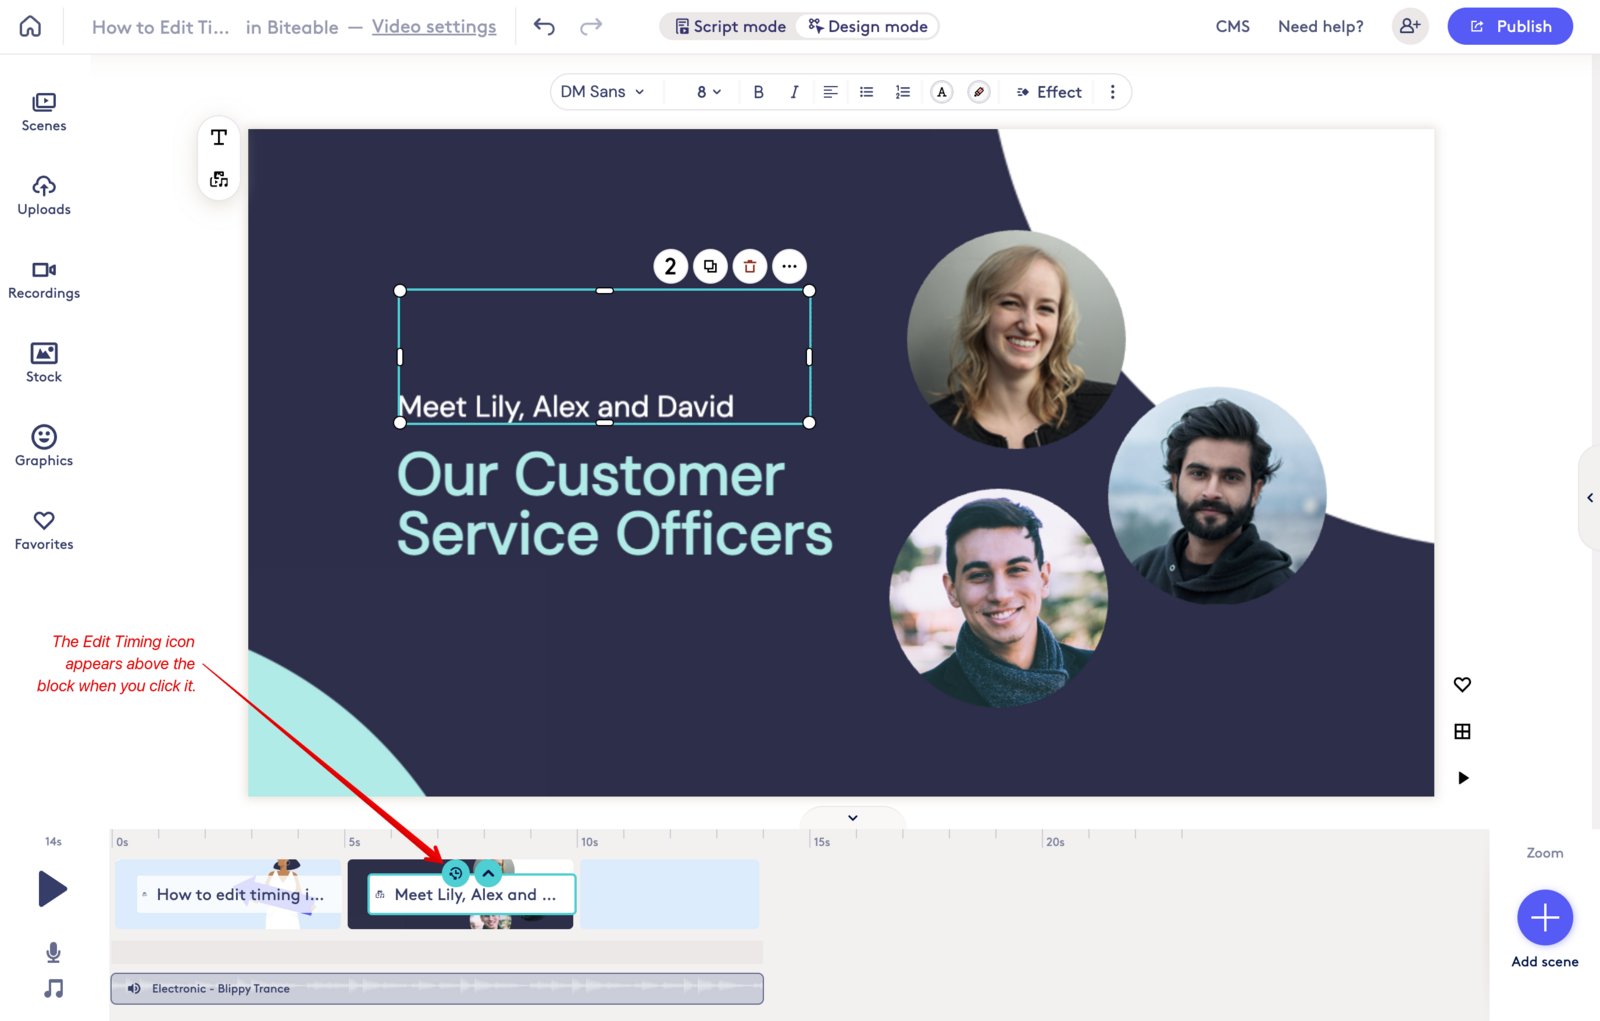
- Next, click once on the block in the scene. Clicking the block will display the "Edit timing" icon
- Click the "Edit timing" icon
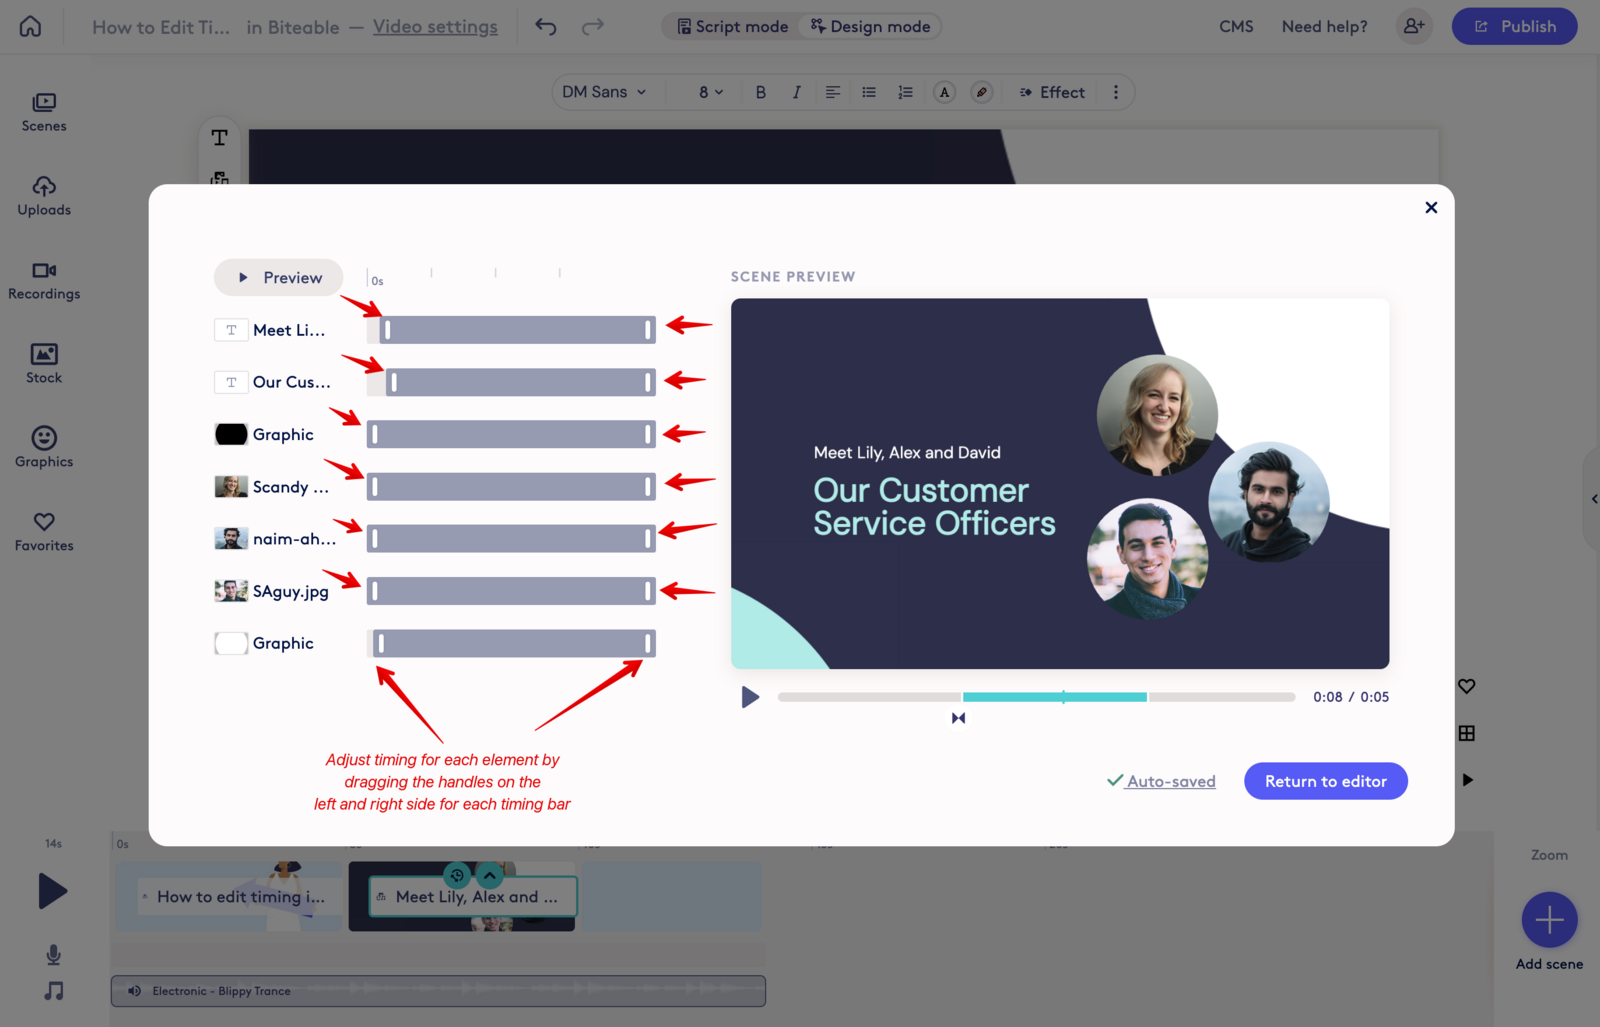
- Each element on the scene will be displayed with a bar that indicates when the element appears, disappears, and the element duration. Click and drag the ends of the bars to adjust the timing for when it appears, disappears, and how long it is displayed in the scene. You can preview your changes by clicking the play button below the scene preview.
- When you're satisfied with the edits, click the "Return to editor" button


How to edit timing from the editor canvas
- From the editor canvas, click once on any element in the scene
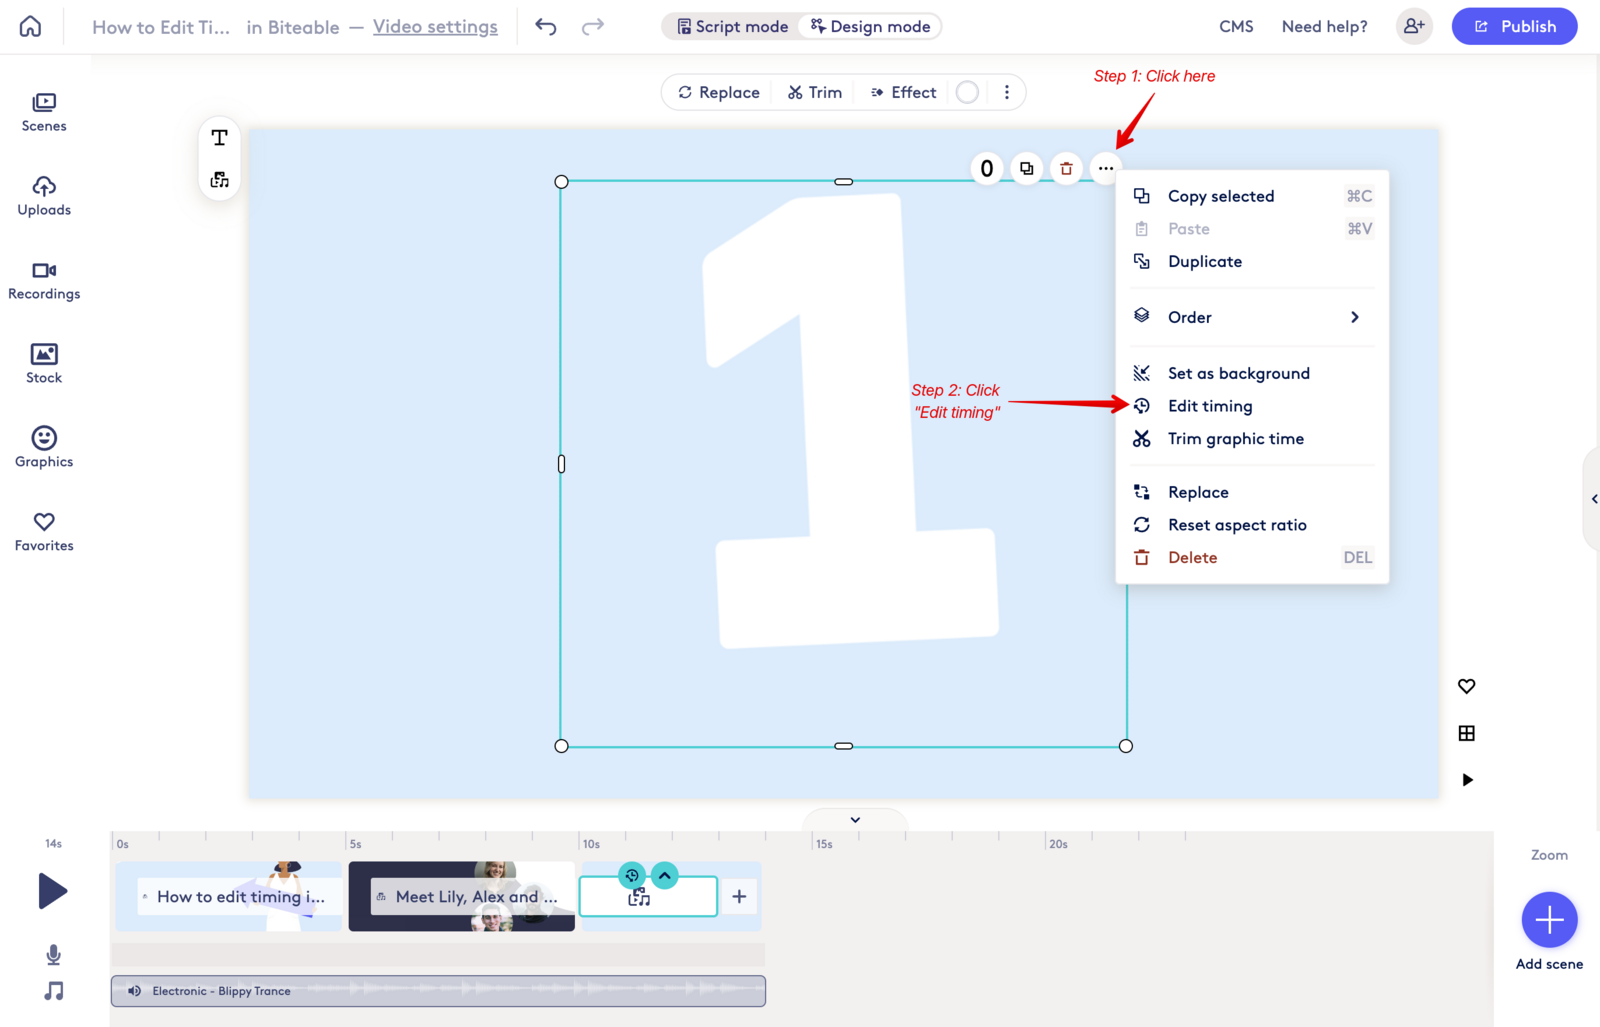
- Click the icon above the element that has three dots (...) to display a menu with more options
- Click the "Edit timing" menu item
- Each element on the scene will be displayed with a bar that indicates when the element appears, disappears, and the element duration. Click and drag the ends of the bars to adjust the timing for when it appears, disappears, and how long it is displayed in the scene. You can preview your changes by clicking the play button below the Scene Preview.
- When you're satisfied with the edits, click the "Return to editor" button